From Fabric to Finish: How to Sew a Designer Suit in 7 Simple Steps
Sewing a designer suit from scratch is an impressive feat that can lead to a perfect fit and a personalized style that is uniquely yours.
While it may seem daunting at first, with the right materials, tools, and techniques, sewing your own suit can be a rewarding experience.
In this article, we’ll take you through how to sew a designer suit in 7 simple steps, providing tips and techniques along the way to help you achieve a professional-looking result.
How to Style Your Suit
Sometimes it could be challenging in styling your suit to look elegant, we’ve got you covered
- Start with a well-tailored suit that fits you perfectly.
- Choose a dress shirt that complements the color of your suit.
- Select a tie that matches your shirt and suit.
- Add a pocket square for a touch of elegance.
- Finish off the look with a pair of leather dress shoes and a belt that complements the color of your shoes.
- Make sure your suit is ironed and free of wrinkles.
- Consider adding cufflinks or a lapel pin for a little extra flair.
- Don’t forget to style your hair and choose the right fragrance.
- Confidence is key – wear your suit with pride and you’re sure to turn heads.
How to Sew a Designer Suit in 7 Simple Steps
1: Choose Your Fabric
The first step to sewing a designer suit is selecting the right fabric. The choice of fabric can affect the look, feel, and durability of the suit, so it’s important to choose wisely.
Here are some tips to help you choose the right fabric for your designer suit:
Consider the occasion – The fabric you choose for your suit should be appropriate for the occasion. For example, a wool suit may be more suitable for a formal event, while a linen suit may be better suited for a summer wedding.
Think about the climate – The climate can also affect the choice of fabric. A heavy wool suit may be too warm for a summer day, while a lightweight cotton suit may not be warm enough for a winter wedding.
Choose quality fabrics – Quality fabrics will not only look better but will also last longer. Look for natural fibers such as wool, silk, or cotton, and avoid synthetic materials that can look cheap and wear poorly.
Consider the pattern – The pattern of the fabric can also affect the look of the suit. A solid-colored fabric will provide a classic look, while a patterned fabric can add a touch of personality to the suit.
2: Take Accurate Measurements
The next step to sewing a designer suit is taking accurate measurements. The key to a well-fitted suit is precise measurements, so take your time to get it right.
Here are some tips to help you take accurate measurements:
Use a tape measure – A flexible tape measure is essential for taking accurate measurements. Avoid using a ruler or a piece of string as they may not be as accurate.
Have someone assist you – Having someone help you take your measurements can make the process easier and more accurate, especially for hard-to-reach areas.
Measure twice – To ensure accuracy, measure each area at least twice, and compare the measurements to ensure consistency.
The important measurements you’ll need to take are:
- Chest – Measure around the fullest part of your chest, keeping the tape measure parallel to the ground.
- Waist – Just above the belly button, measure around the narrowest part of your waist
- Hips – Measure around the widest part of your hips, usually around the buttocks.
- Inseam -At the ankle, measure from the crotch to the bottom.
Also read: How to Sew a Tote Bag Like a Pro: 5 Secrets to Professional-Quality Results
3: Create a Pattern
Once you have your measurements, the next step is to create a pattern. A pattern is a template that will guide you in cutting and sewing the fabric pieces together.
You can use a commercial pattern or draft your own pattern based on your measurements. Here are some tips to help you create a pattern:
Choose the right size – When using a commercial pattern, make sure to choose the right size based on your measurements. Commercial patterns usually come in standard sizes, so you may need to make adjustments to get the perfect fit.
Draft your own pattern – If you choose to draft your own pattern, you’ll need to use your measurements to create a template for each piece of the suit, such as the front and back jacket pieces, sleeves, and pants.
Here are the basic steps to creating a pattern:
- Measure and mark – Use a ruler and pencil to measure and mark your measurements onto the pattern paper. Make sure to add seam allowances to the pattern pieces to allow for sewing.
- Cut out the pattern pieces – Cut out the pattern pieces using sharp scissors, making sure to follow the cutting lines carefully.
- Label the pieces – Label each pattern piece with its name and size, as well as any other relevant information, such as the direction of the grain line.
4: Cut Out the Fabric
Once you have your pattern pieces, it’s time to cut out the fabric. This is a crucial step, as any mistakes at this stage can affect the final result of your suit. Here are some tips to help you cut out the fabric:
Lay out the pattern pieces – Lay out the pattern pieces on the fabric, making sure to follow the grain line indicated on the pattern. The grain line is important as it ensures that the fabric will drape correctly.
Pin the pattern pieces – Pin the pattern pieces to the fabric using straight pins or fabric weights to hold the pieces in place. Make sure to pin along the seam allowances to avoid distorting the fabric.
Cut out the fabric – Use sharp fabric scissors to cut out the fabric pieces, following the cutting lines on the pattern. At this stage, extra care is needed so as not to cut into the seam allowances.
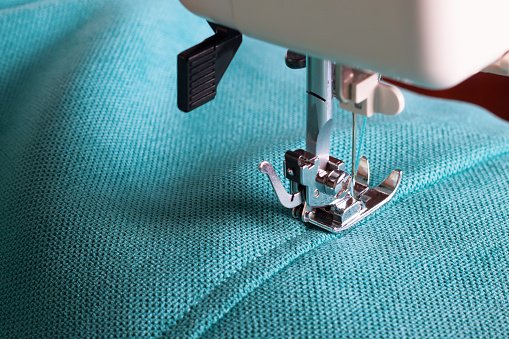
5: Sew the Suit
Now it’s time to start sewing the suit together. This is where your skills as a seamstress will come into play. Here are some tips to help you sew the suit:
Start with the jacket – Start by sewing the jacket together. Follow the instructions on the pattern, making sure to sew each seam accurately and press the seams open or to one side as directed.
Move on to the pants – Once the jacket is complete, move on to the pants. Follow the same steps as for the jacket, making sure to sew each seam accurately and press the seams open or to one side.
Here are some additional tips to help you sew the suit:
- Use the right needle – Use a sharp needle appropriate for the fabric you’re sewing. A dull needle can damage the fabric and cause it to pucker or fray.
- Sew slowly and carefully – Take your time and sew slowly and carefully, especially around curves and corners. Use a backstitch to reinforce the seams and prevent them from unraveling.
- Press the seams – Press the seams open or to one side using an iron. This will help the suit to lay flat and give it a professional finish.
6: Add the Finishing Touches
Once the suit is sewn together, it’s time to add the finishing touches. This includes adding buttons, buttonholes, and any other details that will give the suit a polished look. Here are some tips to help you add the finishing touches:
Choose the right buttons – Choose buttons that are appropriate for the fabric and the style of the suit. For example, a classic suit may use plain buttons, while a more casual suit may use buttons with a bit of personality.
Sew the buttons on carefully – Sew the buttons on carefully, making sure to align them properly and sew them securely. Use a thread that matches the color of the buttons and the fabric.
Add the buttonholes – Add buttonholes to the jacket and pants using a buttonhole attachment on your sewing machine. Make sure to measure and mark the buttonhole placements accurately.
Finish the edges – Finish the edges of the jacket and pants using a serger or a zigzag stitch to prevent fraying.
7: Try on the Suit and Make Adjustments
The final step is to try on the suit and make any necessary adjustments. This is where you can fine-tune the fit of the suit and make any tweaks to ensure that it looks and feels great. Here are some tips to help you make adjustments:
Check the fit – Check the fit of the suit by trying it on and standing in front of a mirror. Pay attention to the fit around the shoulders, waist, hips, and legs. If the suit is too loose or too tight, make the necessary adjustments.
Adjust the length – Adjust the length of the pants and sleeves if necessary. Hem the pants and sleeves using a blind stitch or a topstitch, depending on the style of the suit.
Make any necessary alterations – If the suit requires any additional alterations, such as adjusting the width of the sleeves or taking in the waist, make these changes before finishing the suit.
8: Enjoy Your Designer Suit
Congratulations! You have completed the process of sewing a designer suit in 7 simple steps. Now it’s time to enjoy your new creation. Here are some tips to help you care for your suit:
Dry clean only – To keep your suit looking its best, have it dry cleaned by a professional. Avoid washing it at home, as this can damage the fabric and affect the fit of the suit.
Store it properly – Store your suit in a cool, dry place, such as a closet or a garment bag. Avoid hanging it in direct sunlight or near a heat source, as this can cause the fabric to fade or shrink.
Conclusion
Sewing a designer suit may seem like a daunting task, but with the right tools and techniques, it can be a fun and rewarding experience.
By following these 7 simple steps, you can create a suit that fits you perfectly and showcases your sewing skills. Remember to take your time, be patient, and enjoy the process.